www.GeneralWax.com
The Candle Superstore
The Candle Superstore
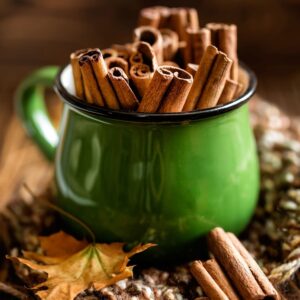
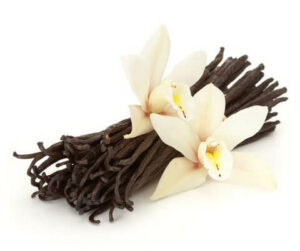
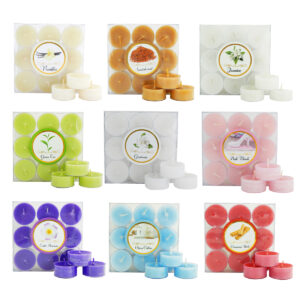
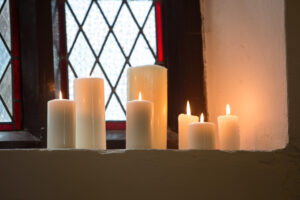
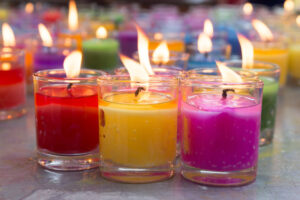
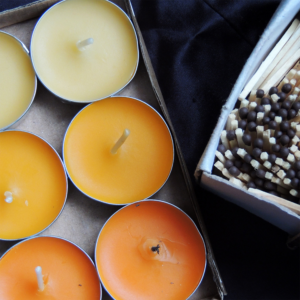
Each season has its own aroma. There are numerous fragrances tailored to diverse personalities, preferences, and moods, but not all are relevant across seasons. While citrus and breezy floral notes are great for summer, winter calls for warm, heavy scents that make you cozy up while ensuring that the weather does not cast a chill on you and your living spaces.
Add these winter candle fragrance oils to your candle collection and enjoy this wonderful time of the year.
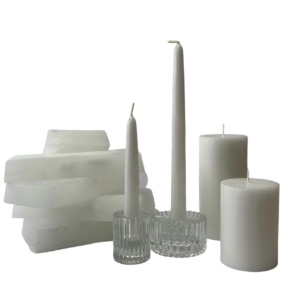
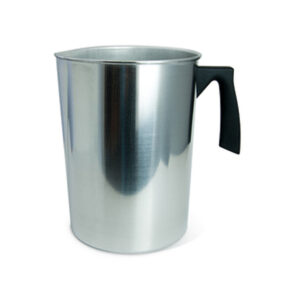
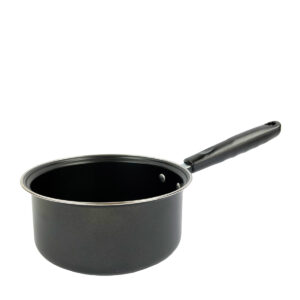
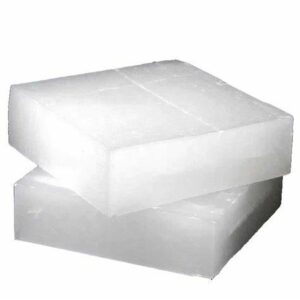
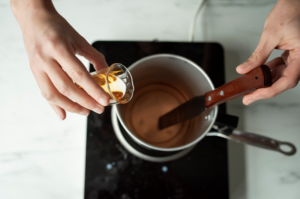
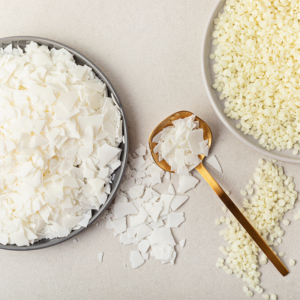
If you have already decided what wax you are going to use for your candle-making project, add it to a melting pot. Different types of waxes, such as soy wax, paraffin wax, palm wax, beeswax, and others, have distinct melting points based on their composition. The melting point of wax refers to the temperature at which the wax transitions from a solid state to a liquid state. It's crucial to be aware of the melting point of the specific wax you are working with because it impacts how the wax behaves during various applications. For example, in candle-making, the melting point determines how well the candle will burn and whether it will hold its shape in different environmental conditions.
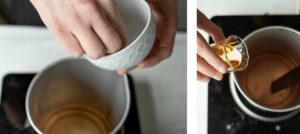
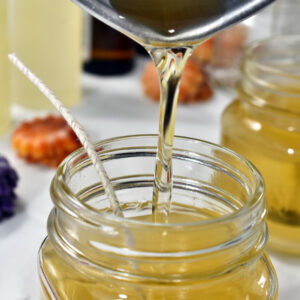
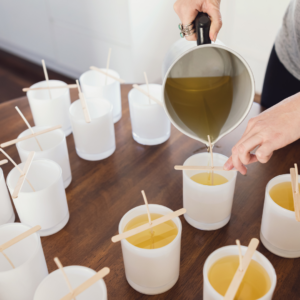
When the wax is fully melted, let it cool down a little, and then add your fragrance oil. Stir the wax and fragrance oil mixture for a few minutes to make sure the fragrance is evenly incorporated. This helps in achieving a consistent scent throughout the candle. After stirring, carefully pour the scented wax into your candle mold or container. Be cautious to avoid spills or splashes.
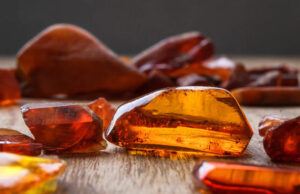
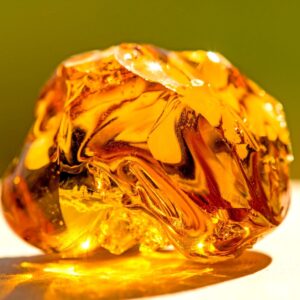
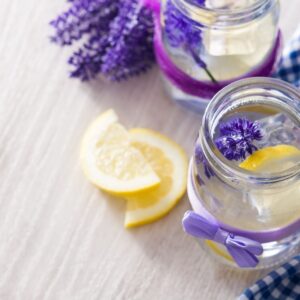
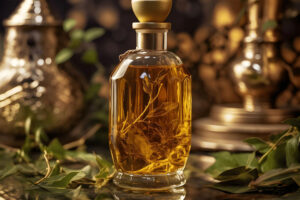
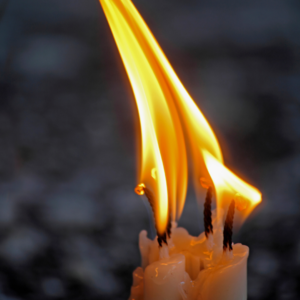
Amber as a winter fragrance is usually very warm, rich, earthy, woodsy, and cozy.
Given that amber is a warm and sweet scent, it's a pretty perfect match for winter when you want all the comforting vibes.
The amber scent is calming and invigorating and will help you relax and unwind after a long day. Add this scent to your candle and enjoy the winter evenings.
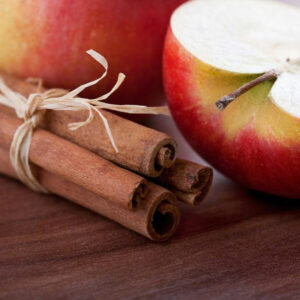
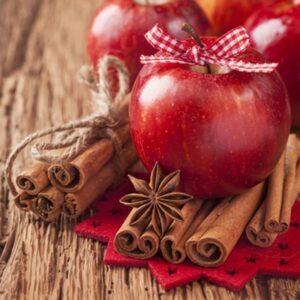
The comforting scent of an apple with cinnamon candle fragrance can promote relaxation and create a sense of happiness. The combination of sweet apples and warm cinnamon can evoke feelings of joy and contentment. This captivating blend of juicy apples and comforting cinnamon elevates your senses, creating a cozy, inviting ambiance.
Aromatically, spicy red cedar and deep, dark patchouli often combine as base notes to enhance warm, sensual, and rich winter fragrances.
Due to its warm properties, cedarwood blends well with herbal oils like lavender, amber, and patchouli. This scent helps those who suffer from headaches or upset stomachs. It is a great way to get rid of stress and provide a sense of relaxation.
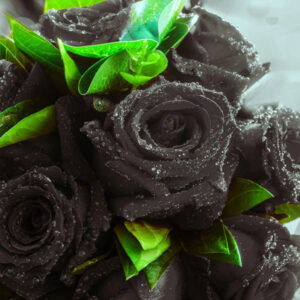
If you love the scent of black roses, there's no reason why you shouldn't surround yourself with it even when the temperatures start to drop. It's timeless, and it goes well with other fragrance elements (amber, sandalwood, and bergamot), which are great as a winter scent.

The blood orange scent is one of the most popular scents, and it’s not surprising as to why—when it is an all-year-round candle, however, with its irreplaceable citrus scent, it's especially wonderful as a winter scent. It also has many health benefits associated with it.
This citrus fragrance oil is very good for those who need a little time out and want to improve their mental well-being. The blood orange scent helps those who perhaps suffer from anxiety, depression, or are grieving. So add this fragrance oil to your candle and enjoy the fresh smell.
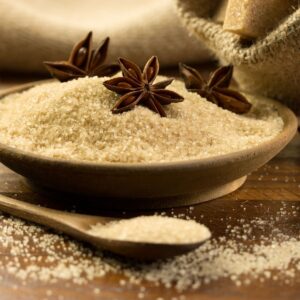
Brown sugar candle fragrance oil adds sweetness to candles in just the same way as it does to cereals, cakes, and candies. A brown sugar fragrance oil can be a warm, sweet, and comforting scent that adds a cozy ambiance to your space. When creating or selecting a brown sugar fragrance oil for candles, consider a combination of various notes to capture the rich and sugary essence.
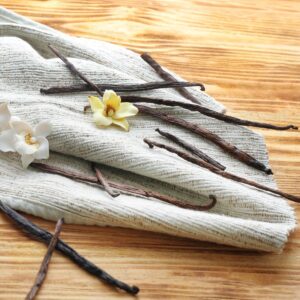
The vanilla scent is great as a winter fragrance. Cashmere vanilla candle fragrance oil is the most common one that is used to increase happiness. They can also stimulate feelings of relaxation as well as joy. This means that vanilla-scented candles won't just make your home smell like a bakery, but they will also help boost your happiness levels in the process.
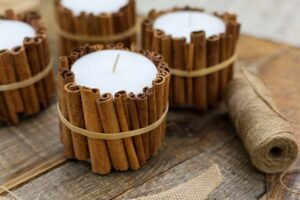
The warm and spicy cinnamon scent is ideal for relaxation and feeling less stressed.
It also eases those headaches and perhaps enhances your visual focus too. Speaking of focus, that is another benefit of the cinnamon-scented candle, too. So be sure to add cinnamon-scented oil to your candle.
For your winter candle collection, use a sweet fragrance oil with tropical fruits and holiday spices mixed with fresh vanilla beans, creamy marshmallows, and a delicious coconut frosting. This fragrance has a relaxing scent that is perfect for the home or spa.
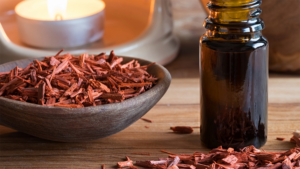
Sandalwood-scented oil is a great option for winter fragrance. It has soft notes of sandalwood and sage to promote relaxation and reduce stress. Candles with this aroma are useful for those with insomnia. It can also be used to treat headaches and migraines.
The winter forest scent is great as a winter scent. It creates a feeling of warmth. This fragrance oil has a refreshing scent of bright evergreen and cypress blended with sparkling notes of lemon and soft Tonka.
Candle making for some is a fun, relaxing hobby that would not break the bank when purchasing supplies for the activity. While for others, candle making is a business opportunity that can bring in some income on the side, or could be the main source of income for some.
For those who sell their very own candles, it is important to know the steps one should take in order to properly sell their merchandise.
The most important step to ensure your product is ready to sell is having warning labels that clearly inform the customer of any risks or hazards that may come from using your product. Without these labels, your business as a whole may be at risk if an accident were to occur due to your product malfunctioning, or performing in a dangerous manner.
Legally, any product that is sold to the public that may be a hazard if handled incorrectly must have a warning label in order to advise the consumer of any risks or hazards. Failing to have a warning label on your candles could have dire consequences on your products’ selling ability, and could have devastating effects on your business as a whole.
Candles that do not wear a warning label can be the subject of a lawsuit if an accident were to occur after a consumer attempted to light your candle. It is important to follow the necessary safety guidelines in order to sell your product safely and securely. Warning labels can be purchased at candle-making outlets, or you may also create your very own label. Safety should never be an afterthought when selling your candles to the public.
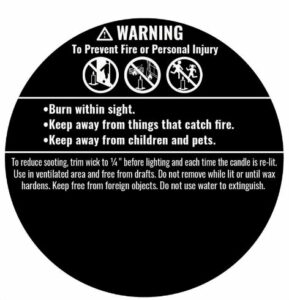
Warning labels on your candle are not meant to be a product design or a pleasing aesthetic for your candle. Having a warning label on your candle can help prevent many unforeseen accidents that may occur due to a lack of care or lack of concentration. Because candles are a fire hazard, it is important to have the proper rules and safety measures displayed on your candle in order to inform the consumer of any potential hazards. When it comes to candles, you may have several rules or warnings displayed on the label, but there are three rules that should always be displayed. These rules/precautions are:
Burning a candle is highly dangerous when neglected or kept within a space that can easily catch fire. Having your candles burn within an area that is easily visible and that is kept away from flammable objects is key to following the candle’s safety precautions. One important thing that all parents should never forget, is that children have a tendency to play with items that look cool or items that can create havoc or destruction. Most children won’t know any better due to their age, so it is important to keep flammable objects, such as candles, away from their reach in order to safely burn your product.
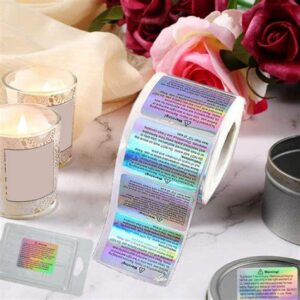
While you can purchase warning labels from different candle outlets, as well as candle-making websites, creating your own warning label can be a great way of adding more originality to your product. Having a warning label with your business’s name on the label can also help with making your brand a household name. While warning labels are a serious component of your candle, creating your own designed labels can add a flare to your design that can make it more attractive to the consumer.
There are several services you can use in order to create your very own label ranging from print centers that print your designs for you, or websites that allow you the freedom to create your own design and print from home. Candle-making requires lots of focus and commitment in order to deliver high-quality products, but having fun is the most important part in creating a product that everyone will love and enjoy.
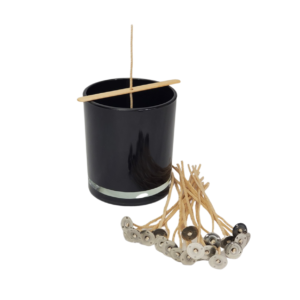
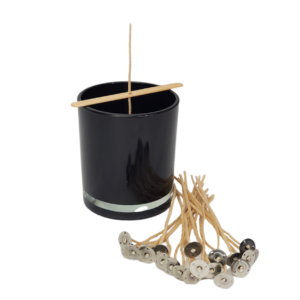
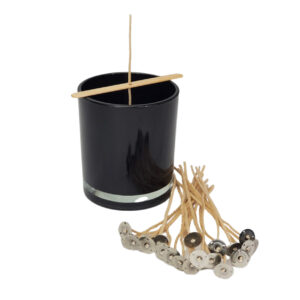
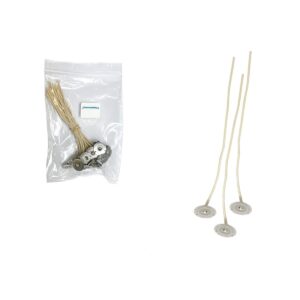
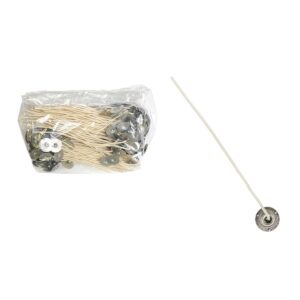
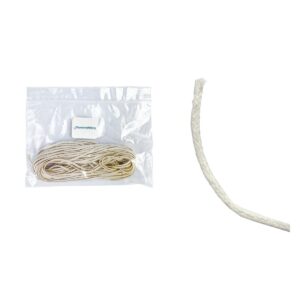
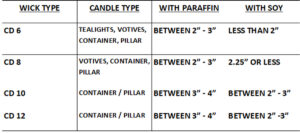
Having the right wick for your candle making projects will be the key to making or breaking your desired finished product. While there are many products that work for one specific area in candle making, one product is extremely versatile in its compatibility and performance. This product comes in the form of our new CD Wicks, designed to be more compatible and more versatile than the common wick.
These wicks are non-directional, coreless cotton flat braid wicks containing paper filament throughout. This in turn creates a “curl” within the wick while it burns overtime. Having a wick that curls is helpful due to the fact that it “self-trims” which helps with any soot that may form around the candle. Along with having the ability to self-trim, these wicks are also able to hold a higher fragrance load, making them more of a viable option for scented candles.
The great thing about these wicks is their versatility and compatibility with multiple candle types. Due to their range of sizes, CD wicks can be used to make tealights, votives, pillars, and even container candles. The diameter of these wicks can range from 2.0”- 4” depending on the size you end up using. They can be distinguished by the number that comes after their name, such as CD 6 or CD 10. This series of Wicks goes from 6-12, except each different wick is classified by an even number.
The full collection is CD 6, CD 8, CD 10, and CD 12. For tealights and votives, we would recommend using the CD 6 wick, as it has the lowest diameter range of 2” – 2.5”. For candle types that have a diameter range of 2.5” – 3/0”, we recommend using the CD 8 wick. And for candle types with a diameter between the range of 3.0” – 4.0”, we recommend using the CD 10 or CD 12 wick, depending on the actual diameter of the product.
The wonderful thing about CD wicks is that they are not only versatile when it comes to their usage with different candle types, but it also applies to the wax you can use with this wick. Due to their increased rigidity, these wicks are incredibly versatile, making them compatible with both single-pour paraffin and soy wax which are known to be more vicious waxes.
When using CD wicks with vegetable waxes such as soy, it is important to note that because this wax is more vicious, meaning thicker, you may have to use a bigger wick size than the one recommended for a certain diameter. For example, a container candle with a 3.0” diameter would usually work best when accompanied by a CD 10 wick. But because soy wax is more viscous, you may have to use a CD 12 wick in order to occupy more space within the container.
While this would complicate things when trying to use soy wax, this problem would not occur with single-pour paraffin wax. Because paraffin wax has a lower melting point, it can move more freely while it cools, unlike soy wax which hardens rapidly once removed from heat. Please see chart below for more of a reference on the wicks compatibility.
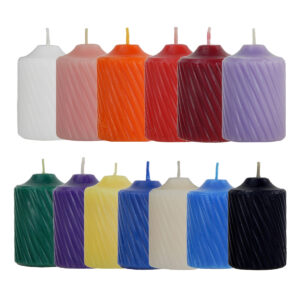
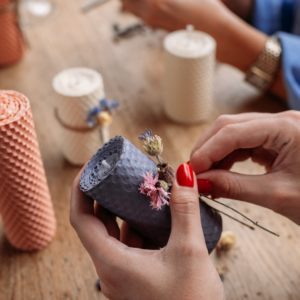
The candle-making world is filled with tons of different candles that come in so many different shapes and sizes. The most unique of the bunch would happen to be novelty candles. Although not the most popular type of candle, these candles are the most versatile in terms of their usage and look. They can be given as gifts, used as holiday decorations, used for birthday celebrations, and used for so many other occasions. Although they are the toughest candles to craft for beginners, learning how to make these types of candles can be a fun and enjoyable process for all levels of candle makers.
These candles are very similar to pillar candles in the way that both require wax that would not spill over once it is lit up. Rather, novelty candles require a wax that would drip slowly once it has been lit, and a wax that is easy to mold once cooled. The best wax for the job would happen to be paraffin wax.
One of the best things about paraffin wax is its versatility when it comes to different forms of candle making. Because the wax has a low melting point, it allows for the wax to cool quicker resulting in the wax being easier to mold. This is one reason why the wax works so well for these types of candles, because of the wax’s ability to be shaped and manipulated.
As we discussed, novelty candles are great due to their versatility and their unique style. Unlike other types of candles, these candles can be formed into many different types of moldings. One of the best examples of novelty candles just happens to be birthday candles. Notice the way birthday candles aren’t just one type of shape? They can be made into numbers in order to represent a person’s age, or they can be made into different colored birthday candles.
Sculpted candles are another example of novelty candles due to their ability to burn without being stood up or without being held within a container. Sculpted candles include holiday-themed figures, religious-themed figures, or any other item that resembles an inanimate object or even a living creature as well. Sparklers are also another great example of novelty candles due to their unique ability to light up and sparkle just like the ones we use for the Fourth of July! In simple terms, any unique type of candle that does not require to be encased within a container or required to be stood up can be defined as a novelty candle.
While most of these candles are sculpted by hand or made with other molding techniques, candles made from molds could also be classified as novelty candles. The most popular type of candle that comes from a mold would happen to be pillar candles. Pillar candles, like novelty candles, can be molded into different shapes and sizes such as squares, stars, and the most common shape being a cylinder.
The difference between a pillar candle made from a mold and a novelty candle made from one is that the mold simply serves as a base for novelty candles. Because of the wax, we are using, which is paraffin, we are able to do so much more with the wax once it has cooled and hardened within the mold. Whereas pillars would simply be meant to be plain and simple, novelty candles are meant to have designs engraved within the candle, or molded into something creative and fun.
Knowing which wax to use for your candle-making projects is essential to becoming a better candle maker. But also knowing your wax’s shelf life and knowing how to store your wax is crucial to being more efficient and saving more money in the long run. Over time, your wax will begin to lose its ability to hold scent and color due to the natural deterioration of its organic elements. Most waxes can be stored for a year or close to two depending on how it is kept and where it is kept.
To have a more in-depth understating of why natural waxes expire with age, we must first understand the science behind it all. Like all natural products, the elements are derived from plants and other natural resources. All organic life forms eventually deteriorate with time, including the natural products used in candle wax. While there are synthetic waxes that may last over a lifetime if stored correctly, the performance of your candles will noticeably decline when using non-natural waxes.

Knowing how to properly store your wax is important in extending the life of the product. The first thing to consider when storing your wax is the temperature at which your wax is being held. Having your wax in an environment with a higher temperature can cause your wax to deteriorate at an extended rate.
Keeping your wax in a cooled environment will protect the chemical bonds within your wax from being altered or destroyed. Making sure to keep your wax sealed will also assist in delaying the product from expiring sooner than you would have wanted. Once the wax has been fully melted and cooled, it can still be housed within a suitable environment to prevent the candle from expiring before it can be lit. Make sure to also consider the melting point of the wax before choosing where to store it in. A wax like Paraffin, which has a lower melting point than other waxes, can not be held within a warm closed environment with no airflow. This will likely cause your wax to melt within its packaging making it unusable.
One last thing to consider when storing your wax would be the light that the wax would be exposed to. Natural sunlight can cause chemical reactions within the wax due to the harmful UV rays contained within the sunlight. Artificial light can also have the same effect, although not as immediate as sunlight. It would be best to keep your wax within a dark environment in order to improve the life span of the wax. Best to keep your wax away from non-cooled areas and keep away from the sun!
While most waxes can last over a year if stored correctly, there are several factors that can affect your wax’s life span. As discussed before, the temperature will have the most impact on how long your wax can perform at its peak while it slowly deteriorates. Even if your wax is held within a room with a lower temperature, you may want to consider how much sunlight is being exposed to the wax.
Sunlight is known to have harmful UV rays that can disrupt the chemical bonds with natural waxes. Because natural waxes do not contain additives that contain a UV Protectant, they are more likely to lose any ability to hold scent or color due to the UV rays of the sunlight affecting the chemical makeup of the wax.
Although additives may help slightly with preventing a chemical reaction from UV rays, over time the additives will deteriorate just as any other chemical would when exposed to harmful UVs. Humidity also plays a key role in affecting the performance of your wax. Humidity can cause unwanted air bubbles making the candle unappealing and less effective in holding scent. Due to the difference in temperature, humidity affects the way your wax cools, leaving unwanted cracks or bubbles within your final product. While humidity affects more of the performance of the wax rather than the life span, it is still important to keep away from humid places in order to sustain the life and performance of your candles.
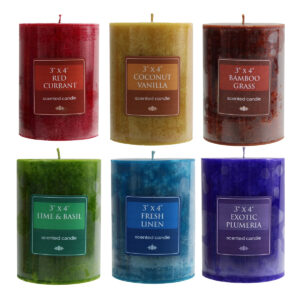
Pillar candles are the quintessential example of just how unique candle makers can be when using their imagination to the fullest! Pillar candles are great for decorative purposes due to their longevity and design, as well as being the perfect gift for any special occasion. While these types of candles are not particularly easy to make, they are a perfect way for an experienced candle maker to take their skills to the next level.
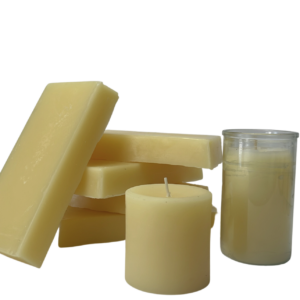
Having a wax that can retain its shape once it has begun melting is crucial to the performance of a pillar candle. Having a wax with a low melting point and an ability to dry quickly once cooled is essential to making a successful pillar candle. Having a wax that does not require it to be encased in order to retain its figure is also key to having a great candle. The wax that meets all the criteria for making amazing pillar candles would be Paraffin Wax. Paraffin wax has a low melting point of 140° F making it ideal for the wax to be used in molds. Due to the low melting point, paraffin wax dries quicker once it is cooled, making your candles last longer. While other pillar candles have no ability to hold scent, paraffin wax has a great scent throw making it more versatile than the rest. Having a wax that can hold both color and scent well is ideal for having a pillar candle that can top the rest.
A common misconception people have when attempting to make pillar candles for the first time is the idea that any wax would work with molds. Although the idea of container wax being compatible with pillar candles makes sense in theory, in practice we see the clear shortcomings of using container wax. Due to the wax’s high melting point, once the pillar begins to melt we see how the wax spills over rather than dripping slowly from the sides. This causes the pillar to dry slower which results in the wax clumping up at the bottom of the pillar.
This is ineffective when seeking a longer burn time, and it is also very unappealing to look at compared to other pillar candles. These clumps that develop at the bottom of the pillar can also stain the surfaces on that the candle is being held. Overall, while in theory container wax would be a great fit for creating a pillar candle, container wax must have a suitable vessel to encase the wax within in order to perform up its standard.

One of the best things about paraffin wax is its versatility when it comes to different forms of candle making. Because the wax has a low melting point, it allows for the wax to cool quicker resulting in the wax being easier to mold. This is one reason why the wax works so well for pillar candles, but it also applies to why it would be the best option for novelty candles. Some examples of novelty candles include birthday candles, sculpted candles, holiday figures, and many other unique candle types that don’t require the wax to be encased or stood up. Novelty candles work as great gifts, as well as unique decorative pieces.
Like pillar candles, novelty candles require wax that won’t spill over rather than drip slowly while burning. While novelty candles can be difficult to create for first-time candle makers, we wouldn’t recommend shying away from giving them a try. These candles are super fun to make, and with the right tools at hand, you can be creating amazing pieces of candles for everyone to enjoy.
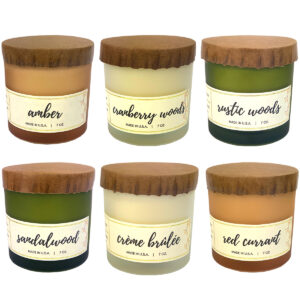
Container candles are some of the most popular types of candles in today's modern candle-making world. They are extremely fun to make and they are beautiful to look at depending on the type of glass you decide to house your candles in. Many beginners love to make container candles due to their simplicity. Using the correct wax in order to make a container candle is critical for the performance of your candle.
Having a wax that can provide an even burn, as well as hold both fragrance and color well is crucial to creating the perfect container candle. In order to receive the best performance from your container candle, it is best to use Soy Wax! Soy wax is great for container candles due to its extended burn time, little to no soot burn, and its great scent throw.
Soy wax provides an even burn so you get the most out of your candles. For all eco-friendly candle makers, not to worry, soy wax has been proven to have the cleanest burns so not only would you be creating amazing candles with this wax, but you would also be helping the environment. Soy wax has no toxins, so it would be less likely to trigger allergies. Overall, soy wax is not only the most compatible wax to use for container candles but it is also the safer and more eco-friendly option.
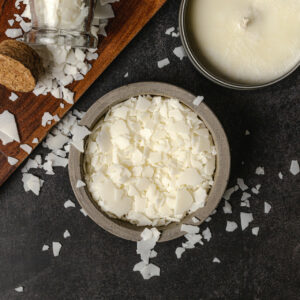
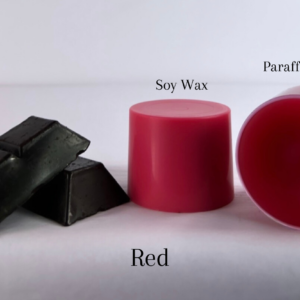
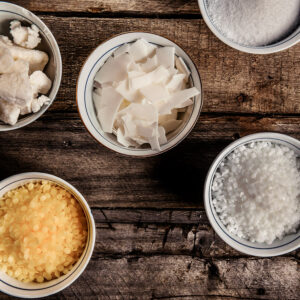
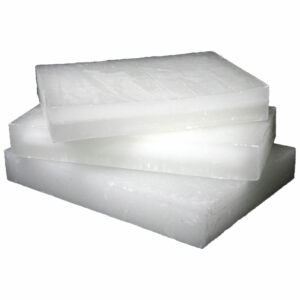
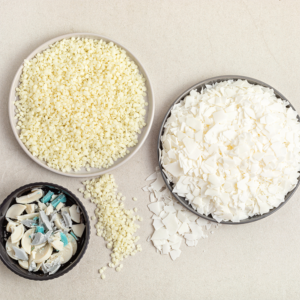
Although soy wax is the clear-cut favorite for all container candles, it is important to know the differences between each wax. The most popular waxes that are used for candle-making are Soy Wax, Beeswax, Paraffin wax, and Coconut wax. We’ve already discussed why soy wax is great for container candles, but that doesn’t mean it’s best for every type of candle.
Paraffin wax is great for making taper candles and pillar candles. This wax holds color the best, and it is highly versatile in its usage. Paraffin wax is also very inexpensive which is why beginners usually start off with paraffin wax. Paraffin wax also does not burn as long as Soy wax making it less worth the while if you are looking for a long burn time.
Beeswax, like paraffin, is great to use for taper and pillared candles. Beeswax has been for a long time making it the most reliable of the bunch. This wax has the longest burn time out of the rest, and it has little drip when compared to other waxes. Beeswax has a warm-toned flame which doesn’t give off any smoke from your candle, making it good for both your home and the environment. One downside for beginners is that this wax is much more expensive than paraffin and soy.
The reason for this is due to the natural production of this wax and the popularity of it. While beeswax is more of a higher quality when comparing burn time and the performance of other waxes, we wouldn’t recommend it for beginners who are not looking to break the bank when starting their candle-making journey.

Coconut wax is a newer wax that has very similar attributes to soy wax. In fact, more times than not, Coconut wax will usually be found in a blend with soy wax. This wax burns extremely well, giving an even burn to almost every candle. Many people think the coconut factor may affect the scent of their candle, but Coconut wax is actually scent free and works very well with fragrance oils.
Coconut wax is another great alternative for container candles if you would like a more vegan and eco-friendly wax. Although it is a great wax to use for beginners, it is often found in blends more than it’s sold on its own. For a purer wax, Soy will always be the go-to wax for great performance, great scent throw, and amazing compatibility with glass jars.
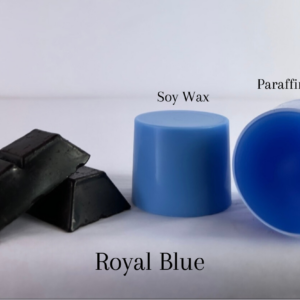
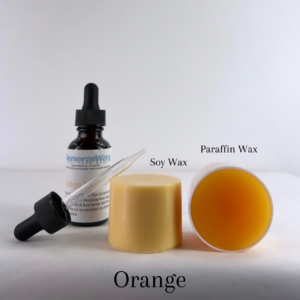
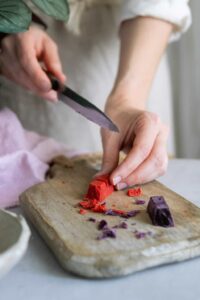
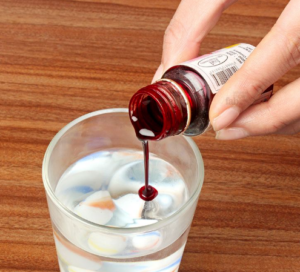
Many new candle makers often wonder how to get the best results when attempting to color their wax. While candle makers may be familiar with the process of adding different types of colorant to their wax in order to create a beautiful-looking candle, the majority of beginners struggle with when they should be adding their colorant to their wax blend. Adding colorant to your wax while it is too hot can cause the color to not consistently incorporate with the wax, while adding it to your wax when too cold can cause the colorant to not dissolve completely, leaving behind annoying dye particles.
Adding colorant to your wax blend is a very easy and simple process, the hardest part may be cleaning up! The first thing to note would be the amount that should be added to each pound of wax, which would depend on the type of colorant being used. If you are using liquid dye, one drop of dye should be enough to color a whole pound of wax. If you are using candle dye chips, one whole chip would be enough to color one pound of wax. As for dye blocks, shaving pieces off of the block would change the shade of the color you are looking to add. On average, a dye block would be able to color 5-50 lbs. of wax per block, so use very sparingly for a lighter shade. Please note that testing should always be done in order to ensure you receive your preferred color shade. Putting a couple of drops of wax on a white piece of paper will show the current color at which your wax will cool at.
The most important thing to remember before adding your candle colorant is the state your wax must be at in order to begin adding. Your wax must be fully melted in order to fully incorporate any colorant. Depending on the wax you are using, most times the wax would have fully melted at around 175°- 185° F. You want to add your colorant during this state in order to receive the best results. Adding candle colorant while the wax is still in a solid state or when the wax is too hot will result in the colorant underperforming. Dye chips/blocks for candles melt smoothly around 160°-180° F, so it is recommended to once again test different temperatures around that range in order to find which gives you the best result. Liquid dyes can be added any time after the wax has fully melted into its liquid state, although be aware of going too low a temperature or too high.
One final factor that can affect the timing of when the candle colorant should be added to your wax is the addition of candle fragrance oil. Fragrance oil can affect the chemical makeup of any colorant, so it is important to know the steps to take in order to incorporate both into your wax blend. The first thing to note is that your fragrance oil should always be added first. Adding your fragrance oil after the colorant can cause major color changes and will result in the wax undergoing discoloration. In order to have a wax blend that works with both fragrance oil and colorant, you must use products that will be compatible with one another. For example, a fragrance oil with a flash point between 130°-180° can be compatible with any candle colorant due to the lesser hazard this fragrance oil will cause due to its flash point. For fragrance oils that have flash points at 130° F or lower, it would be best to use liquid dye due to the fact that liquid dye will leave less dye particles once your wax has cooled and reverted back to a solid state. It is important to always do extensive research on the products you are using in order to receive the best, and safest results for your candles.
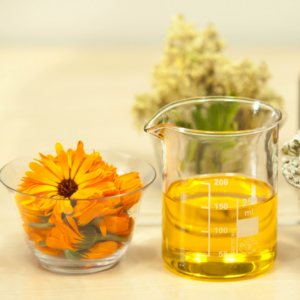
Adding fragrance oil to your wax is a fun and very easy way to help your candles stand out from the rest! While many new candle makers may be familiar with the idea of adding fragrance oil to their wax in order to produce a wonderful-smelling candle, most actually struggle with when they should be adding the oil to their wax blend. Adding fragrance oil to your wax while it is too hot, or too cold, can have dire effects on the potency of the fragrance. Both times resulted in the wax having little to no scent while burning.

Adding fragrance oil to your wax may seem a little daunting to first-time candle makers, especially to those attempting their first-ever wax blend. But not to worry beginners, adding fragrance oil is actually a very simple process as long as you follow these steps. The first thing to note would be the amount that should be added to each pound of wax which would be, 1oz of fragrance per 1 pound of wax. Please do note that tests should always be done to ensure that you are adding the proper amount of wax to fulfill your personal preference.
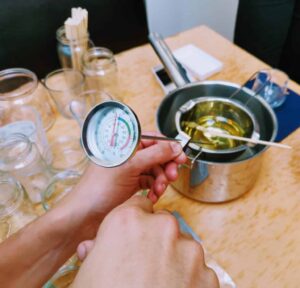
While figuring out how much fragrance oil should be added to your batch is important, knowing when you should be adding the oil is crucial to the result of the candle and its performance. When to add your fragrance oil is not necessarily based on the appearance and state of the wax, rather it is dependent on the temperature at which your wax is fully melted. Depending on the wax you are using, most times the wax would have fully melted at around 175°- 185° F. You want to add your fragrance oil at around 155°- 165° F once your wax begins to cool, at which point you can incorporate the oil thoroughly with the wax and pour once both have combined.
The temperature of which adding the fragrance oil may slightly vary when using different waxes, so it is important to know the melting point at which it is best to mix for each wax. Usually, any wax would begin to melt at around 130° F, but the point at which the wax will be ready to mix differs. If you are using soy wax, it is recommended to begin mixing once the wax hits about 155° - 165° F. Really, it’s all about knowing your wax melting point along with what temperature is best to mix at. Please also note that each wax should hit its max melting point in order to fully melt the wax all through, once it is cooled to its desired temperature you may then add the fragrance oil.
If you are unfamiliar with what the Flash Point of fragrance oil for candles is, Flash Point refers to the temperature at which a fragrance oil becomes combustible. This can be rather dangerous when attempting to light up the candle as the wick may cause a spark in the composition of the candle, causing it to combust. Always make sure you are adding your fragrance oil at the recommended flash point depending on how high or low the temperature is. For flash points under 130° F, always add the fragrance oil at or below 130°. For flash points between 130° - 180°, always add the fragrance oil at or slightly below the designated flash point. For example, a fragrance oil for candles with a flash point at 155° can be either added at 140° - 150° F or exactly at 150° F. For any flash point above 180°, never add the fragrance oil above that temperature.
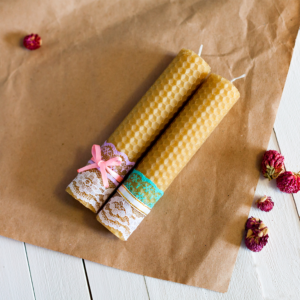
Making your own candles can seem like a difficult and confusing process to new candle makers. Often times new candle makers will struggle with where to begin their journey in candle making. Well, a very fun and easy way to begin your career in candle making can start with tapered candles. Taper candles are fun and easy to make for new beginners, and they look great as well!

Taper candles are tall, thin candles that can stand on it’s or own, or could be placed in holders. Taper candles can vary based on their size, diameter, and color. The burn time at which a taper can burn depends on the candle wax you use to make the taper and the wick that holds the taper. Height also plays a huge factor in the time at which a taper can burn.
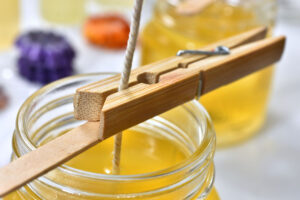
A reason why a taper candle can be very easy to make is the fact that only a few pieces of equipment are needed to create them. The items needed to create a taper include wax, wicks, and a melting pot to melt your wax. I would also recommend a mason jar in order to support the taper.
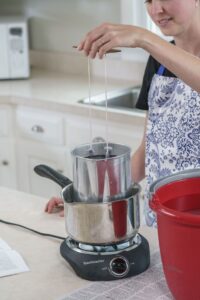
To start the process of making a taper, you must first melt your wax in a melting pot. We recommend boiling a pot of water to rest your wax over in order to keep it from drying. Once your wax is melted down to the recommended temperature of 165 F, you can begin the dipping process. Before dipping your wicks into the wax, make sure they are trimmed down to your desired size.
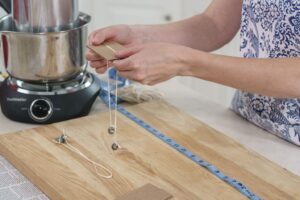
Make sure to always add an extra 2 cm to your desired length in order to have a better melt. Once the wicks have been trimmed, you may begin dipping them into the hot wax. Keep the wicks submerged until you see air bubbles appear, once the air bubbles are completely gone you may then remove the wicks from the wax. Leave the freshly dipped wick in a warmed jar in order to keep them straightened and to avoid the wax drying completely. Once you have coated all of your wicks, place the remaining wax over the pot with boiled water in order to keep it warm enough to coat the wicks once again.
Once your wicks have cooled, re-dip them into the remaining wax to cover them in another coat of wax. Hang the wicks on a drying rack to allow them to cool and dry. Repeat this process until you have reached your desired size. Make sure you leave enough room for the wick to burn thoroughly. Once all is said and done, you will have beautiful tapers for yourself or others you may want to share them with.
To make your tapers more visually appealing we would recommend adding color to your final result. In order to add color, you must add candle dye to your wax as the wax is melting. We have step-by-step instructions on how to your dye your wax on our page, but in a simple explanation, you may use dye blocks or liquid dye to color your wax. For the dye blocks, use shavings sparingly in order to get the desired shade of color you would like. As for the dye, you may use one drop for every 5 lbs. of wax. Add both while the wax is at 185 F to get the best results.
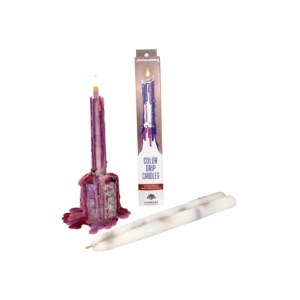
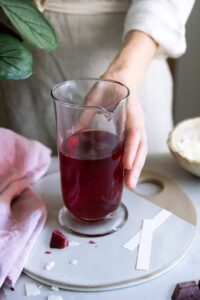
Making your own candles is already a fun and exciting accomplishment to start, but how can you take it to the next level? Plain white candles can be often boring and dull, but adding color to your candles can spice things up, especially for the holiday season of Christmas. A color that stands out during the Christmas season is the color red. Red reminds us of the many icons we think of during Christmas which include, Red Stockings, candy canes, and of course Santa Claus!
The idea of adding color to your candles may seem like a difficult task, but this process can be completed within a few easy steps. First, you must melt the wax you are using to make the candles, make sure it is completely melted before proceeding. Next, add the colorants of the specific color you are looking to make, in this case, we would be using red. Finally, pour the wax into your mold, and you’ll have yourself a beautiful colored candle!
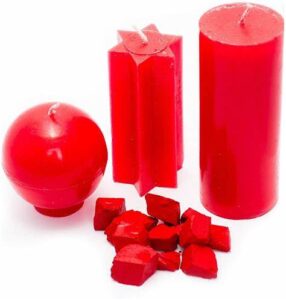
The best colorant to use in order to make your candles red would be candle dye. There are three dyes in particular that are used for coloring wax, they include, liquid candle dye, dye blocks, and food coloring. It would be your personal preference based on which colorant gives you the best look for your candle, but all three work great with wax.

If you are using liquid dye, about 1 ounce of dye should be enough color for 125 lbs. of wax. So it is safe to say that one drop should do the trick for coloring your wax red. If you are using dye blocks or dye chips, it is recommended to shave off a couple of flakes in order to have a lighter shade of red, or if you are looking for a darker shade, you may add half a block or the whole dye block to receive a darker shade of red.

Depending on which colorant you will be using to color your wax, you would have to add them based on the temperature. For dye blocks, the recommended temperature at which you should be adding them is 185 F. For liquid dye, you may add one drop during the melting point in order to see the best results. We always recommend testing the results first in order to know how much should be added and at what temperature point the colorant should be added in order to best fit the candle you envisioned making.
Now that you have made your very own red-colored candles, it may feel like something more could be added to make them even more special. Adding some fragrance oil could help elevate the creativity of your candle. It is recommended to add the fragrance oil to the melted wax before adding the colorant to your mixture. Depending on the wax, we would recommend adding 1 ounce per pound of wax to get the best results.
DO THESE STEPS APPLY TO ALL COLORS
These steps go beyond more than just red holiday candles; it applies to whatever colors your imagination is set on. You can create multi-color candles that represent a multitude of holidays. You can create a blue and pink candle to represent the new baby at a gender reveal party, the possibilities are limited only by your imagination and creativity. So go on and create some beautiful Christmas-themed candles, or create whatever your imagination envisioned.
Crafting an outdoor candle can get pretty tricky as you want to be mindful of the fragrance oils you are crafting with, as certain scents can attract bugs when you ultimately want to repel them!
Having an outdoor candle burning as you're relaxing on your patio, sitting by the pool or having dinner in your backyard can not only add that extra glow to the ambiance but it can also rid you of pesky bugs like mosquitoes and flies.
Creating a candle for outdoors is perfect for adding an extra touch to your outdoor décor. It’s especially great for the summer as a bright light can attract bugs.
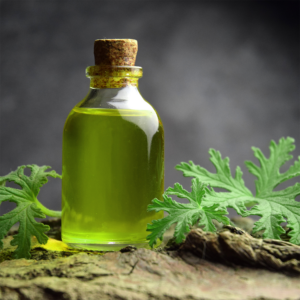
Citronella candle fragrance: As a natural insect repellent citronella fragrance oils are perfect for crafting candles for outdoors as they already contain components that repel insects like mosquitoes. Its fragrance is grassy and floral making the perfect outdoor scent.
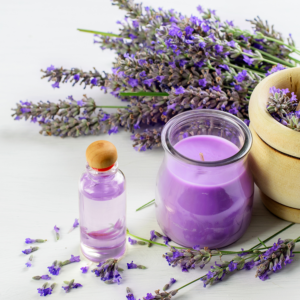
Lavender candle fragrance: Lavender fragrance oils are great for outdoor candles as it has analgesic, antifungal and antiseptic qualities. Not only can it prevent mosquito bites it can also help soothe and calm the skin if bitten by insects or reactive to outdoor plants. Its sweet smelling floral, herbal, and woodsy scent will create the perfect outdoor aroma as you relax on your patio.
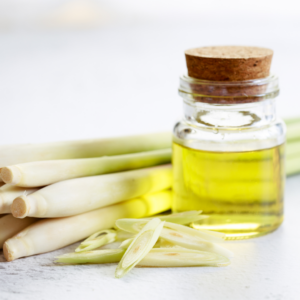
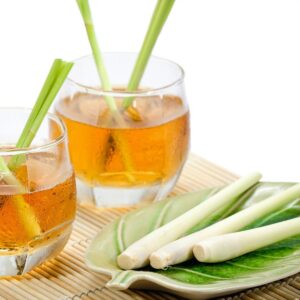
Lemongrass candle fragrance: Derived from natural and non-toxic plants, lemongrass, much like Citronella, is great for repelling pesky insects that come with outdoor fun. With its fresh, lightweight and lemony scent lemongrass drives insects away and can also help boost your health.
Candle Safety Tips: Candles are a great way to add a new aroma to your home as well as a great addition to your home décor! The love for candles can grow so great that it can become a great hobby that may or may not transform into an at-home business!
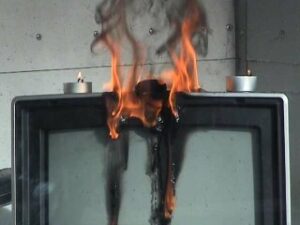
Although having candles in your home can be a great addition and making them from home can be convenient and fun, it's important that we take the necessary safety measures to ensure we keep ourselves and our neighbors safe. The National Fire Protection Association reported that there are an average 21 home fires caused by candles, which can be prevented by following candle safety measures.
No matter your skill level or the amount of candles you’ve burned in your home it’s extremely important to continue taking safety precautions throughout your candle-making process and when it’s time to burn them.


When crafting candles in your home or any workspace for that matter, it is important that you have the proper equipment within reach to make sure that your process runs smoothly and if there are any additional mishaps they can be taken care of right away.
Important safety equipment
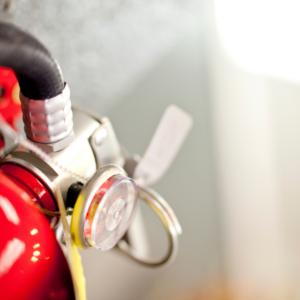
- Fire Extinguisher: Have a fire extinguisher nearby or in your work space. Much like cooking oil, using water to put out a fire near hot wax can cause the wax to behave more aggressively meaning it may splatter.
- Safety Goggles: Use safety goggles when pouring wax into your vessels so that the wax doesn’t splash into your eyes.
- Heat resistance gloves or Potholders : Specifically for handling pans and other hot equipment. Using heat resistant gloves or potholders will prevent you from touching something hot and possibly causing a spill.
- First Aid Kit : It’s essential to have a first aid kit nearby or in your work space in case you need to tend to any injuries.

It’s important that you use proper candle-making equipment to ensure when crafting you are using the right equipment that will perform correctly for the many tasks that come with candle making.
As much fun as crafting candles can be, it is a very tedious and time consuming process, but it’s important that you never leave wax to melt unattended or walk away from a lit stove. Even electric stoves and wax melters can pose a fire hazard if you leave the room while they’re on.
Keep your space clean
Much like cooking it’s important to clean as you go when crafting candles to refrain from having unwanted spills or accidents like a cloth catching fire.
When crafting candles at home in your kitchen it’s important that you clean your space before you get started, cleaning up any cooking messes you may have had prior to starting your candle project. Cleaning up any cooking oil is especially important, as this can create a fire hazard. Also move any flammable products out of the way before getting started.
Ventilation in your workspace is also very important when crafting candles. Be sure to get airflow going by opening a window or using a fan to circulate the air in your workspace. Additionally, it may also be beneficial to tie back your hair or wear your hair in an updo. Not only does this keep your hair safe from any open flames, it also prevents any stray hairs falling into your products.

Overall, it is extremely important that when you are crafting a candle you take safety precautions to ensure you and your neighbors will not be put in danger. It is also important to read all the instructions listed on your products.
EXTRA TIPS:
Have you ever crafted a candle and once you light it it’s not burning properly, meaning you are experiencing a low flame and almost zero melt pool. If this is an issue you’re experiencing, continue reading to learn more!
Candle making can become very technical and is an ongoing process of trial and error, but it's important to know that if you are experiencing issues such as low flame and little to no melt pool it can be attributed to multiple things, here we will go over the different factors that can contribute to this problem.
To begin, in order for a candle to burn properly it needs fuel/oxygen. When it comes to candle making if your candle lacks fuel/ oxygen this will affect your candle's flame. Your candle gets its fuel/oxygen from the wax. Reasons your candle may not be receiving any fuel/oxygen could be because of fragrance oil overload, too much dye added to wax, or the wrong wick size.
Moreover, if ingredients are overloaded this can lead to your wick becoming clogged and not being able to perform at its best. It could also be as simple as your wick being the wrong size for the vessel you are currently using.
So let's get to the details, what does it mean to overload your candle with additional ingredients?
First, it’s important to know that when crafting scented candles it's important to use fragrance oils that are meant or can be used for candle making. Fragrance oils are great when you want to create a scented candle(s), but if you add too much fragrance oils it can alter the size of your flame meaning it becomes clogged by an overload of oils.
When you light a candle it may look like the melt pool is what is creating the scent, you’d be surprised to know that the melt pool is not entirely where the scent is derived from. When a candle is burning, for it to burn properly the wax and fragrance oil must travel up through the wick igniting the scent but if there is an overload this burn flow will be altered.
Fragrance oil overload can also contribute to a mushrooming wick which can also affect your candle flame. Most waxes have a recommended fragrance oil load of 3% - 12% max. It is important to follow recommended instructions.
Candle making dye, much like fragrance oils can also overload your wax which can lead to clogging your wick if too much dye is being added to your melted wax. We recommend adding your dye into your wax moderately and testing the color by scooping some of the wax on a spoon and placing it on a paper towel and letting the color set to ensure you have the right color.
Having the wrong sized wick can affect your candle greatly in the way that if you have a wick that is too small it can lead to clogging as it may drown in wax as well as not be able to create the proper sized burn pool.
If your wick is too large it can cause the wick to get smaller as it will create a large melt pool that the wick may curl into. Additionally, if you have too many wicks it can cause the wicks to droop as it will also create a large melt pool, as well as cause a low flame as each wick will be taking up fuel/oxygen.
Problem-solving
In order to fix these issues, you must test everything, meaning remeasuring the amount of ingredients you are using and craft “test candles. Thus, meaning you must try reducing the amount of dye being used as well as fragrance oils. You must also test wick size meaning you must increase wick size or reduce wick size depending on what is happening to your flame. You may also want to try different candle containers as well as wax blends.
The key to candle-making is to test test TEST. Test everything to ensure you are crafting not only a quality candle but a safe quality candle.
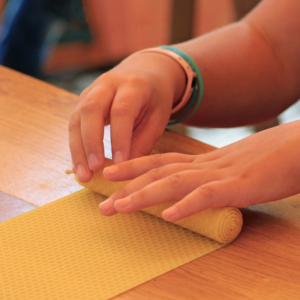
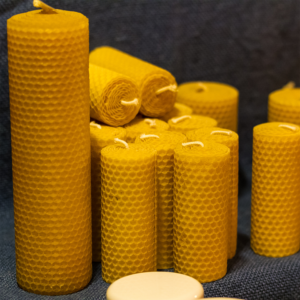
During these hot summer days, it can be tricky trying to find something fun and engaging for you and your family to do together especially, when celebrating national holidays like Father’s day and more indoors. Take a look at this fun at-home beeswax candle-making project to do with your family, with 5 easy steps and simple supplies needed.
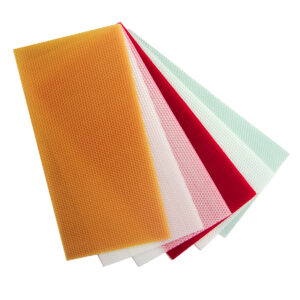
In this at-home project, we will be crafting candles using 100% beeswax honeycomb sheets!
Honeycomb sheets are unscented and easy to use, requiring no heat or added fragrance. These honeycomb sheets can easily be cut into designs and appliqués and the best part is they come in a variety of different bright colors so you can take your creativity in any direction you’d like.
To begin, you need the following supplies:
Now, you can add candle glitter or any other decorations to your candle to customize as your own.
Beeswax sheets are soft and flexible and can be easily rolled up to make candles with a natural aroma. Crafting with beeswax material will ensure your candle can be used for a long time. 100% beeswax honeycomb sheets are perfectly suitable for candle-making, crafts, modeling, bowstring waxing, sealing bottles and jars or just for plain decorating. These uniquely textured sheets are available in different vibrant colors and can be used for rolling taper candles and pillar candles.
As a candle maker, it can be tedious looking for the right candle wax that not only fit your budget but fit your lifestyle and values. To continue to do our part not only by providing a variety of products to cater to all candle makers we are also doing our part to preserve our environment by carrying products that are 100% natural.
All of our 100% natural waxes can be considered “plant-based” and even vegan as they are processed using naturally derived ingredients. In this blog, our candle-making expert will go over all of our 100% natural products and their benefits.


Our new G1 Superior 100% Soy Wax is naturally derived from vegetable soybeans and has many advantages such as an extended burn time, no unsightly black soot, and is less likely to trigger allergies.
This product has a creamy texture with great glass adhesion and a melting point of 122F – 126F. Manufactured with the candle makers in mind. While there are other soy waxes available, this was designed and made for candle users, not the food industry. For example, others will process the wax in less than 2 hours, G1’s process takes over 4 hours. The slower process leaves many double bonds. The double bonds are very good to help reduce the chances of fat blooming also known as frosting.
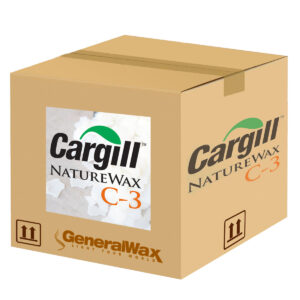
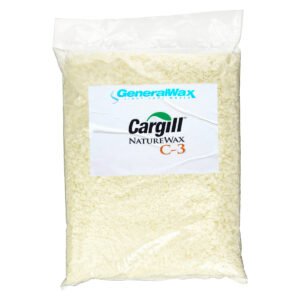
Our Cargill C3 Nature wax is 100% Soy Wax and is quite resistant to bloom (white frosting) and “wet spots” while producing an excellent scent throw with fragrances. This 100% soy wax is specifically designed for container candles, producing an opaque product with a balanced, creamy look and has great adhesion to glass. Shrinkage is minimal when cooling however most jars will require touch-up with a heat gun or a second pouring. It comes in flake form with a melting point of 127℉ and a flash point >600℉.
Our manufacturing processes separate the protein from the oil to create oils that are GMO free. We use only GMO free oils to create our waxes. Our wax has been tested using the PCR test method (the industry standard used to verify non-GMO claims), and the qualitative test results have shown that GMOs are “Not detected.”
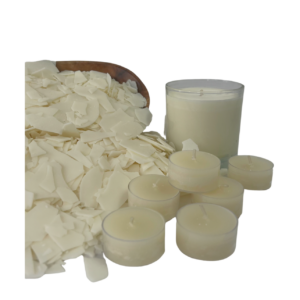
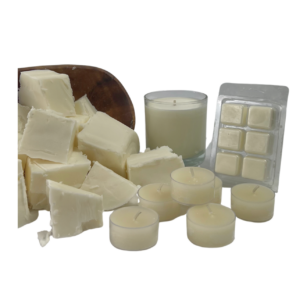
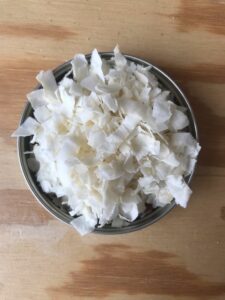
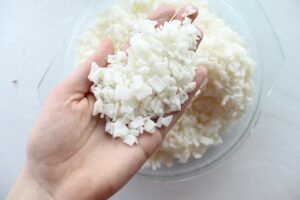
Soy wax is a 100% natural wax derived from the vegetable soybeans. Soy wax is made from environmentally friendly, renewable resources. This wax has many advantages: an extended burn time, no unsightly black soot, and it’s a naturally-derived product.
Soy wax is perfect for container candles, tealight candles, wax melts and tarts. Some of the benefits of this wax are clean burning and being long-lasting. Since soy wax has no toxins, it is less likely to trigger allergies. Soy wax burns cooler which means that you can enjoy your soy wax candle for generally 30-50% longer.
100% Beeswax
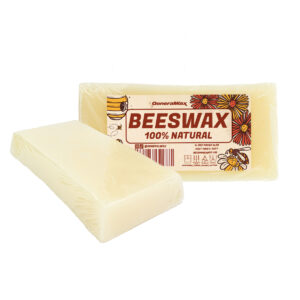
Our premium-grade, 100% beeswax is all-natural, chemical and particle-free. The beeswax is perfect for candle and soap making, batiking fabric, painting in encaustics, or mixing up a batch of specialty furniture polish. Beeswax candles are also commonly used during religious services as well as numerous hobby and craft projects.
This Beeswax is easy to use and perfect for those who want to craft candles using natural products and again great for the environment.
100% Beeswax Honeycomb Sheets

Our 100% beeswax honeycomb sheets are richly colored and textured. This beeswax sheet is soft and flexible and can be easily rolled up to make an elegant candle with a natural aroma. By making it with beeswax material, your candle can be used for a long time. This product is perfectly suitable for candle-making, crafts, modeling, bowstring waxing, sealing bottles and jars or just for plain decorating. These uniquely textured sheets are available in different vibrant colors and can be used for rolling taper candles and pillar candles.
As mentioned before each of our 100% natural waxes is considered “plant-based” and even vegan as they are processed using naturally derived ingredients. These products are easy to use and great for not only candle-making but other at-home craft projects you may have.
When crafting candles, deciding which wax you’ll use is a crucial part of the production as well as the performance of your candle. Each wax is different and usually designed to do a certain purpose, which is why many candle makers are sometimes surprised to know they may need an additive to ensure they get the best quality candle out of their wax. In this blog our candle making expert will go over what additives are and why you may need them.
Additives are additional products/ingredients that you can add to your candle wax to improve the quality of the finished product.
Currently, we carry 10 different candle additives all of which have a different purpose to ensure the best performance and quality of your candles.
Note: It’s important to understand before using additives that some waxes are already blended with additives so there is no need to add additional additives. However, most wax described as a base paraffin wax meaning they have been blended with paraffin but there were no performance enhancing additives blended in at the time of its manufacturing will likely need an additive such as our Vybar 260.
Wax additives can help reduce product imperfections as well as the performance of your candle, they may also enhance the appearance and overall lifespan of your product.
Wax additives can split into 3 distinct groups.
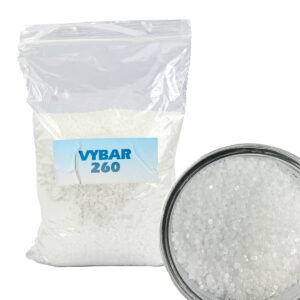
Polymers: Polymers also known as synthetic polyethylenes and copolymers. These additives are used to improve the appearance and performance of a candle. Vybars are the most commonly used polymer to improve opacity, hardness, fragrance retention and color.
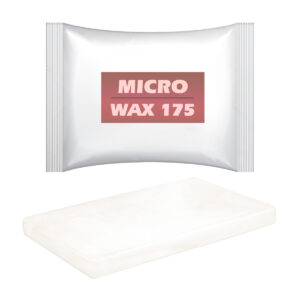
Microcrystalline Waxes: Microcrystalline waxes are used to harden wax, glass adhesion in container candles and elevating fragrance load.
Individually Based Solution Additives: Stearic Acid, Stearin, Mineral Oils, Mottling Oils, Polysorbate, UV Light Inhibitor and UV Light Stabilizer, EVA, Petrolatum, Polyethylene, Container Maker and Universal Additive are mostly used to improve the appearance and to enhance the scent and color lifespan.
There are many pros and cons to using additives as they do help enhance your candle wax but some additives have unnatural ingredients that some candle makers dislike. Ultimately though you do not have to use additives if it does not fit into your candle making process a good alternative for an additive to harden your candles as well as staying natural would be adding Beeswax to your wax.
To learn in explicit details about each of our additives please read our previous blog
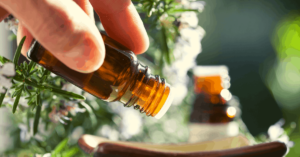
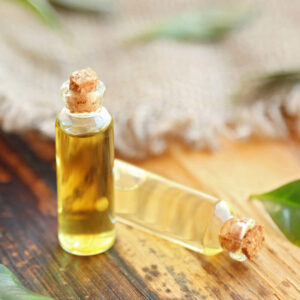
Once you begin candle making it’s always exciting experimenting with different fragrances oils, as well as essential oils but it’s important to understand what is the right amount of fragrance oils that should be added to your candle wax. As well as when you should add your oils to your candle wax.
Fragrance oils are defined as a concentrated blend of synthetic or natural aroma components used to create a scented oil. In addition, fragrance oils have been mixed with scentless carrier oils allowing the aroma to be lightweight which will allow your scent to come through once burned.
Essential oils are defined as concentrated oil derived from an organic/natural substance (plant material, flowers, leaves, wood, and grass). In addition, these oils are referred to as “essential” as they contain the strongest scent that a particular plant, root, or flower contains, embodying its full essence.
To learn more about the differences between essential oils and fragrance oils read our previous blog Fragrance oils vs. Essentials oils: Defining oils for scented candles.
When using candle fragrance oils, the amount of fragrance oil you use depends on the type of wax, the type of fragrance oil, and of course your personal preferences of scent throw.
Scent throw
The Scent throw is the quality of smell in which your candle gives off. The over aroma it will create in your space.
Important to note: Using too little fragrance may result in a light scent throw, while using too much may result in a strong hot throw. Also, it is important to be careful to not overload your wax with fragrance oils, this can lead to your candle sweating or curdling and other issues.
We recommend using 1 ounce of fragrance oils per pound of wax you will be using to craft your candles.
Measurements
It is also important to note when measuring out how much candle wax and fragrance oil you will be using, it is essential to note that we suggest you work with ounces (oz.) or grams (g), ultimately measuring oils in ounces.
For Soy wax, the recommended fragrance load is about 9% Depending on how many candles you will be making and the capacity of your candle vessel.
For Coconut and blended waxes, you can add about 10% to 12% of fragrance oils to your wax, keep in mind this will give your candle a very strong scent.
The fragrance oil ratios are important as they may also impact your candle wicks and the melt pool of the candle. Finding the perfect balance is definitely a challenge for all candle makers but it’s imperative that you test during your candle-making process to know which products work best for you and to observe how each product works when crafting.